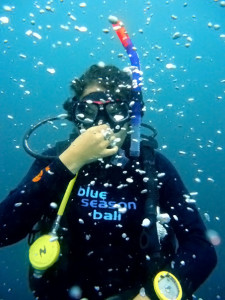
With the introduction of the new PADI Open Water Diver Course, more and more divers are being introduced to using Surface Marker Buoys “SMB’s” from their very first dive course. This is great, as once mastered, it is a fantastic piece of safety equipment to always have on you. Especially here in Bali where we very often encounter drift dives on Nusa Penida. I must admit, the first time I was asked to use one of these was on my Divemaster Course, I can remember being filled with a sense of dread at the thought of being dragged to the surface, feet first, with my SMB line wrapped around my legs.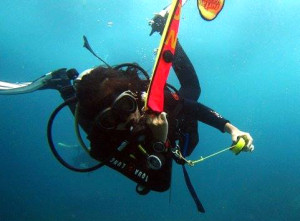
There is a better way. Here are some tips on how to master the SMB:
- You will need: Any surface marker buoy, a reel with a minimum of 15m (45ft) of line. Finger reels are my preference, but have a look at what feels most comfortable to you. The line that comes with some SMB’s (not a reel) can be an entanglement hazard, but use whatever is most comfortable for you.
- There are two prevailing designs for Surface Marker Bouys these days, the open bottom design (typically with a no-spill design) and the one-way oral/LPI valve, the only real difference is in the method of inflation; for this article, we will only discuss the open bottom SMB as they are most prevalent.
- An open bottom SMB is a bag with an opening at the bottom, through which it is inflated. Bags that have a “no spill design” are ideal as they will not allow air to escape at the surface and thus will not collapse, making them ideal for surface signaling. Usually they come with a triangle like nylon rope attached to the bottom with a metal O ring, attach a double sided clip to this with the other side attached to your reel.
- Ascend to your 5m (15ft) safety stop depth, get neutrally buoyant (this is an important step), get out your SMB.
- Blow a little air from your regulator exhaust into the bottom of your bag, this will make the SMB “stand up” and will be easier for you to manage. The easiest way to do this is to tilt your head to the right with the smb on the left side of your face, use your thumb and fingers to open the bag and “catch” the escaping air as you breathe out.
- Now, unlock the reel so that it is ready to be deployed.
- With the reel in your left hand, out in front of you and slightly to the left, open the bag with your thumb and fingers and use your alternate air source to fill the bag with air. You want the mouthpiece to be horizontal with the opening of the bag (ie don’t put the mouth piece facing up as it may free flow before you are ready.) Hold the alternate just below the bag so that you are sure to avoid it getting caught as the bag goes up.
Some extra notes
- Breathe out as you let the bag ascend, this will offset any positive buoyancy (upward force) created by the rising bag.
- If something goes wrong, let it all go and move out of the way. Ascend slowly and gather your smb and spool on the surface.
- Once your SMB has been deployed, pull gently on the line to create tension, this will ensure that your SMB is standing up-right on the surface and is easy to see.
- If possible, practice in the pool before you use your SMB for the first time.
Happy diving 🙂